
Entering Expenses via Mobile is very similar to entering expenses on a desktop computer.
Simply go to hroptions.honeycombhr.com and enter your name and password. Click on the "Log In to HR Options" button.
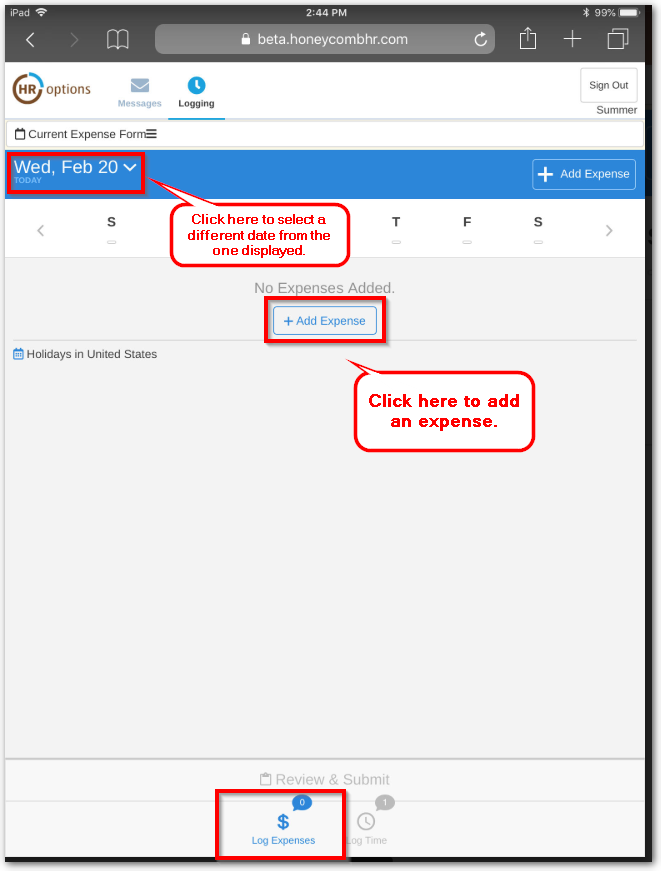
The "Log Time" Screen will automatically appear. Click on the "Log Expenses" icon at the bottom left of your screen to navigate to the expense module.
1. The current date and applicable pay cycle will display at the top. You may select a different date by clicking on the drop down arrow next to the current date, clicking on a different day of the week, or clicking on the arrows (highlighted below).
2. Click on the "Add Expense" button to enter an expense.
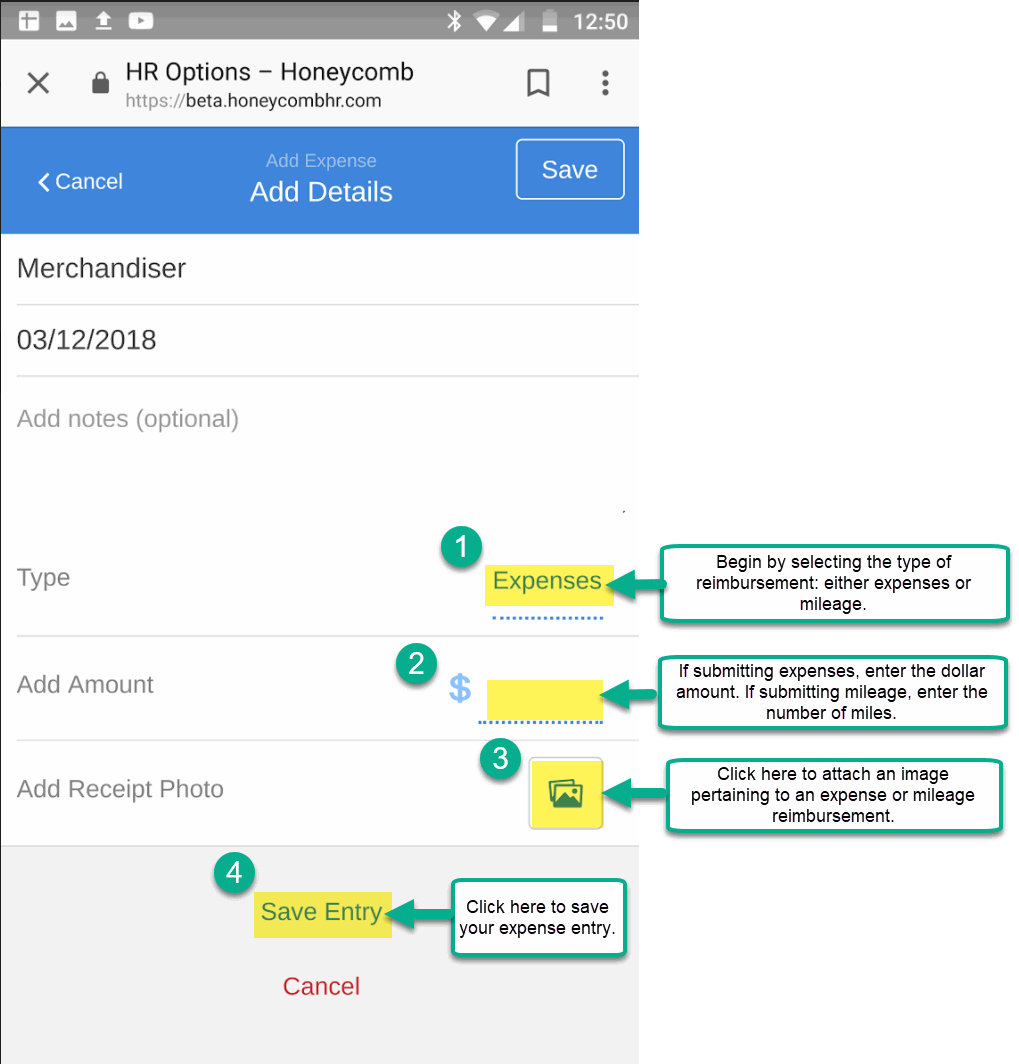
Begin by clicking on "Type" to select the reimbursement you are submitting: either expenses or mileage.
Add the amount of the expense you are requesting reimbursement for. If electing an expense reimbursement, enter the dollar amount of the expense. If submitting mileage, enter the number of miles driven. Honeycomb will automatically calculate the mileage rate.
If attaching a receipt or photo, click on the image icon to the right of "Add Receipt Photo."
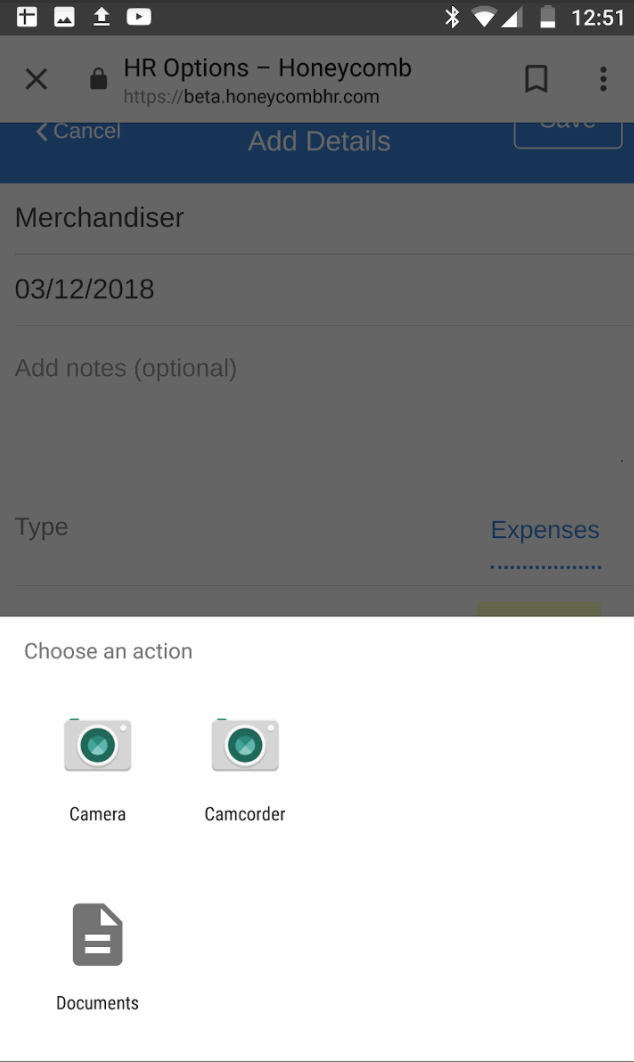
If attaching an image pertaining to an expense or mileage reimbursement, click on the image icon and select the applicable action.
To take a picture of a receipt, select the camera option.
To upload a previously saved or downloaded document, click on the document option and select the applicable document.
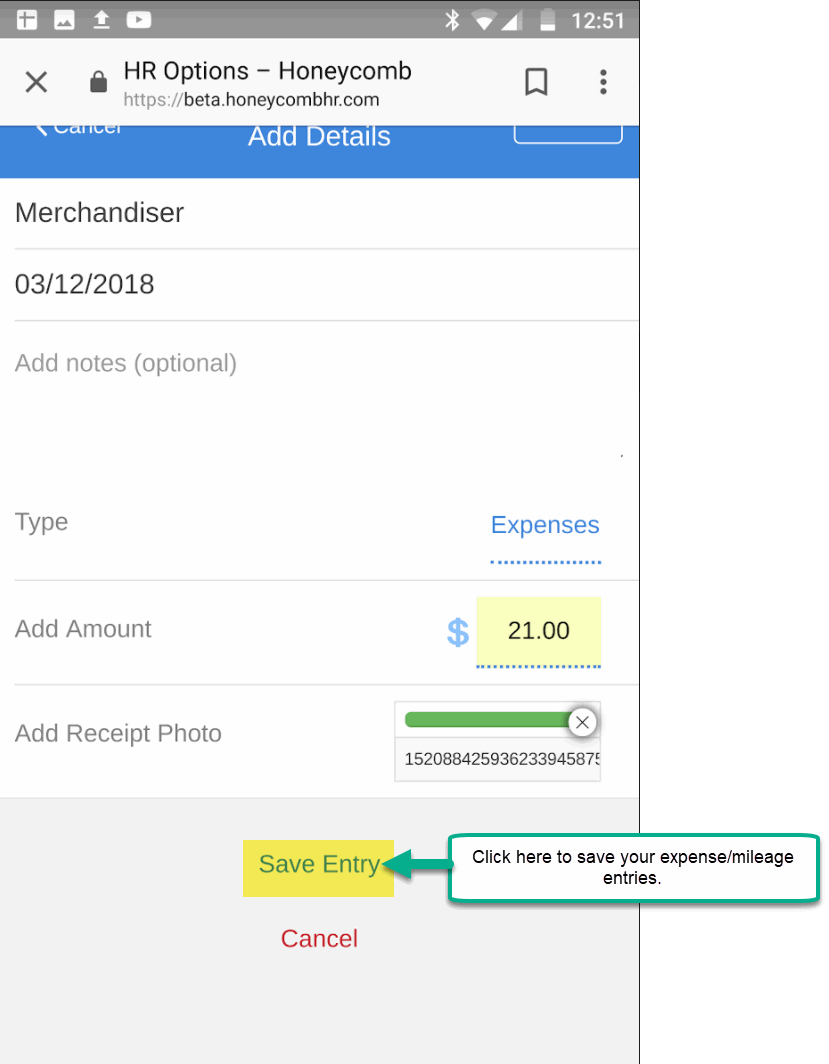
Remember to Click "Save" after entering each expense or mileage reimbursement entry.
At the end of the bi-weekly pay cycle, review and submit any applicable expenses or mileage reimbursements for approval. Once your expenses have been approved, you will receive an approval message via email.
0 Comments