
Contents
- Getting to know the Honeycomb “Time” Page
- Logging Hours Worked
- Submitting Your Timesheet
- Getting to know the Honeycomb “Time” Page. There are a few key areas on the “Time” page to be aware of:
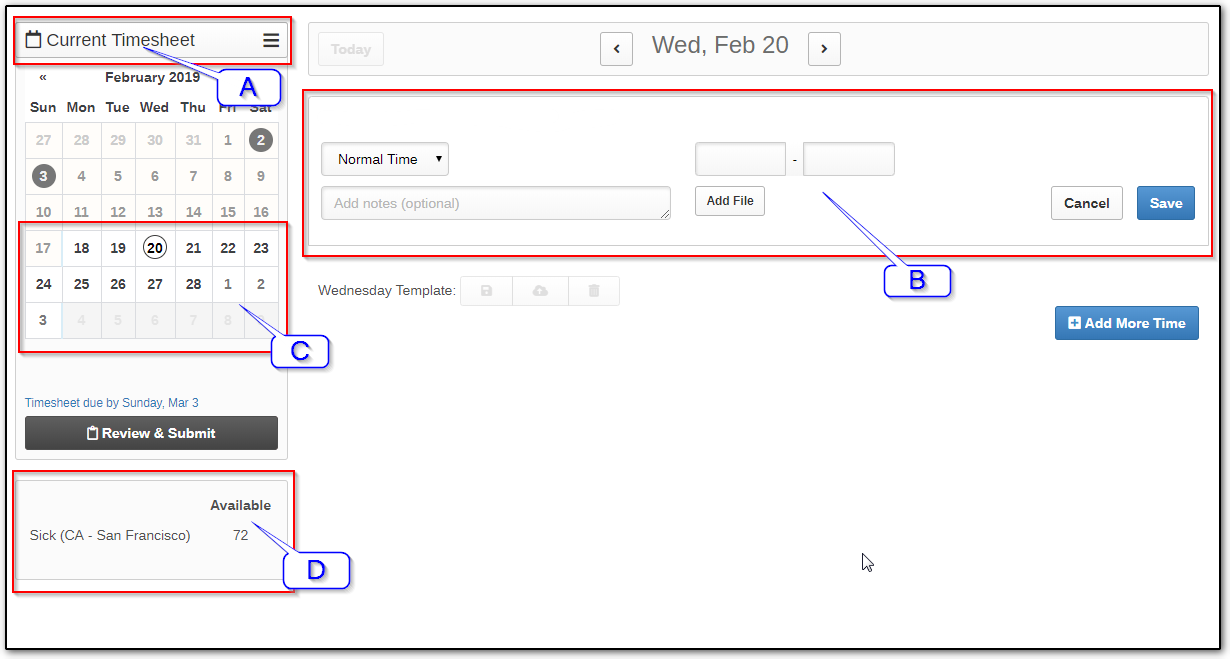
A. This dropdown menu allows you view different types of recorded time, including the current timesheet and any declined timesheets.
B. This entry module is where you’ll record your hours. You’ll be able to select the paycode and hour range as well as attach files and notes to your entries if need be.
C. The bolded portion of the calendar shows the dates of the current pay cycle. All the days recorded in the selected timesheet type (area “A”) will be highlighted with a blue circle. This will indicate what entries are included in that submission.
D. This box shows your available number of hours for time off.
- Logging Your Hours
Use the dropdown menus in the center of the page (highlighted below in red) to select the times you began and stopped working.After you have saved your time entry, you can click the “Add More Time” button (highlighted below in yellow) to record another entry.
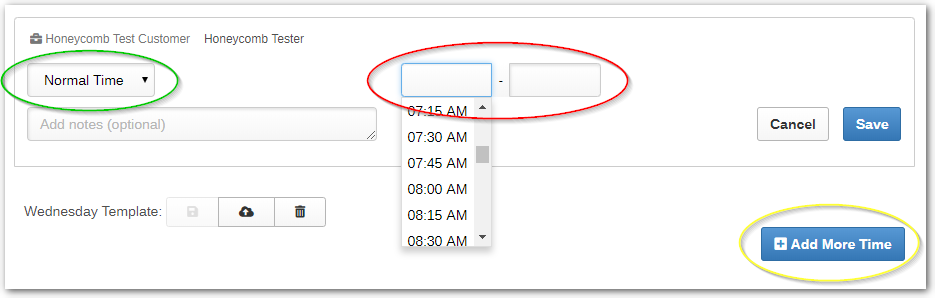
“Normal time” is the default type of time to be logged, and is used for normal working hours. However, you can also use this module to record sick or vacation time, using the drop-down menu (highlighted above in green).
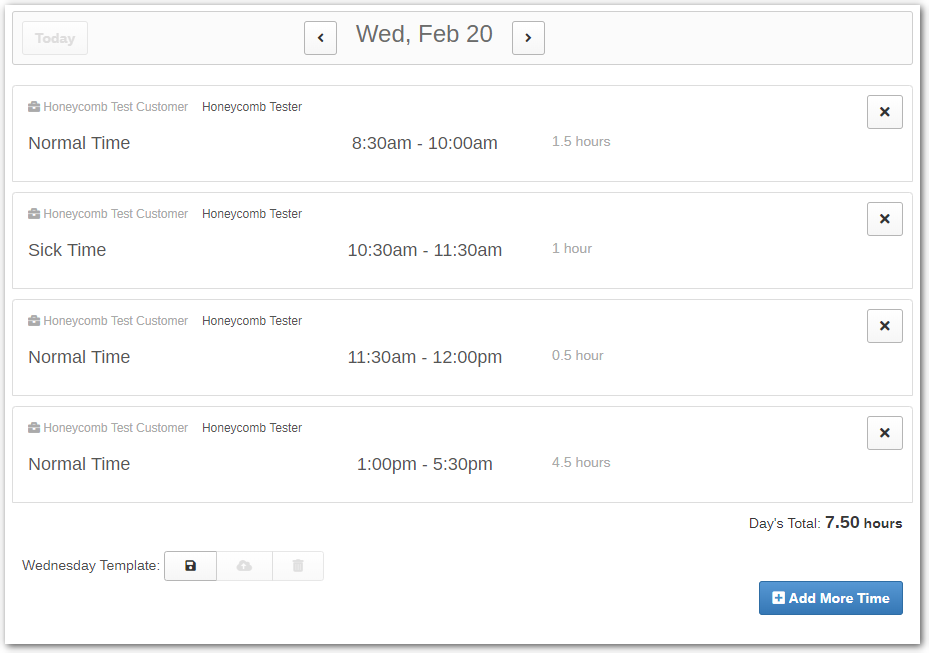
To log your meal breaks, you will enter the time you begin working each day through the time you leave for your break. Then you'll enter the time you returned from the break through the time you leave for the day.
For example, a full day’s work broken up by an hour-long lunch break would look like this:

As another example, if an employee had to attend a mid-morning doctor’s appointment, their timesheet for that day would look like this:
For more details about meal breaks, please refer to our “How do I Log my Meal Breaks?” article.
- Submitting Your Timesheet
At the end of each pay period, when you have successfully logged all of your time, you will click the “Review and Submit” button, seen on the left-hand side, below the calendar. It looks like this:

Clicking this button will bring you to this page, where you will review your time entries:
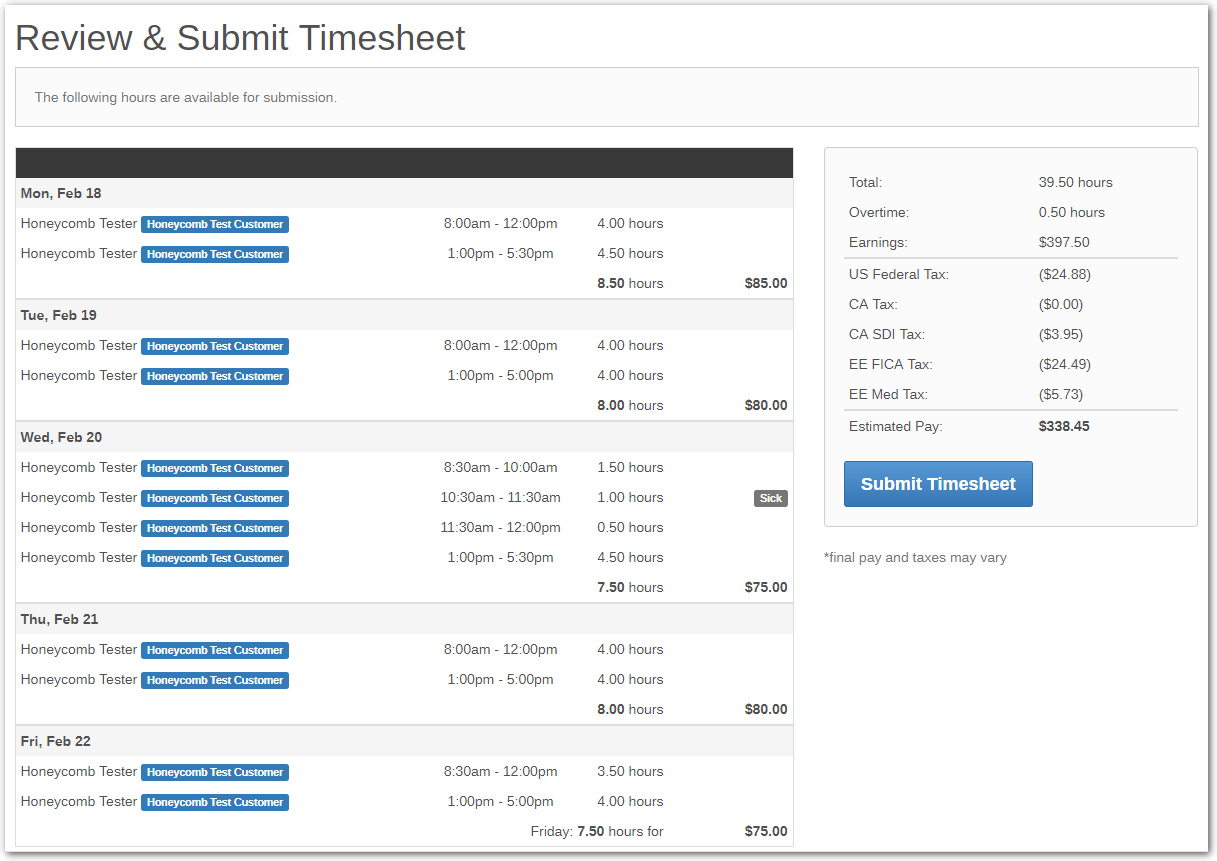
If all your time is listed correctly, hit “Submit” to send your time to your manager, who will approve it for payment.
0 Comments